Restoring Vintage Photos into Nostalgic Gifts: Techniques with Heart and Craft
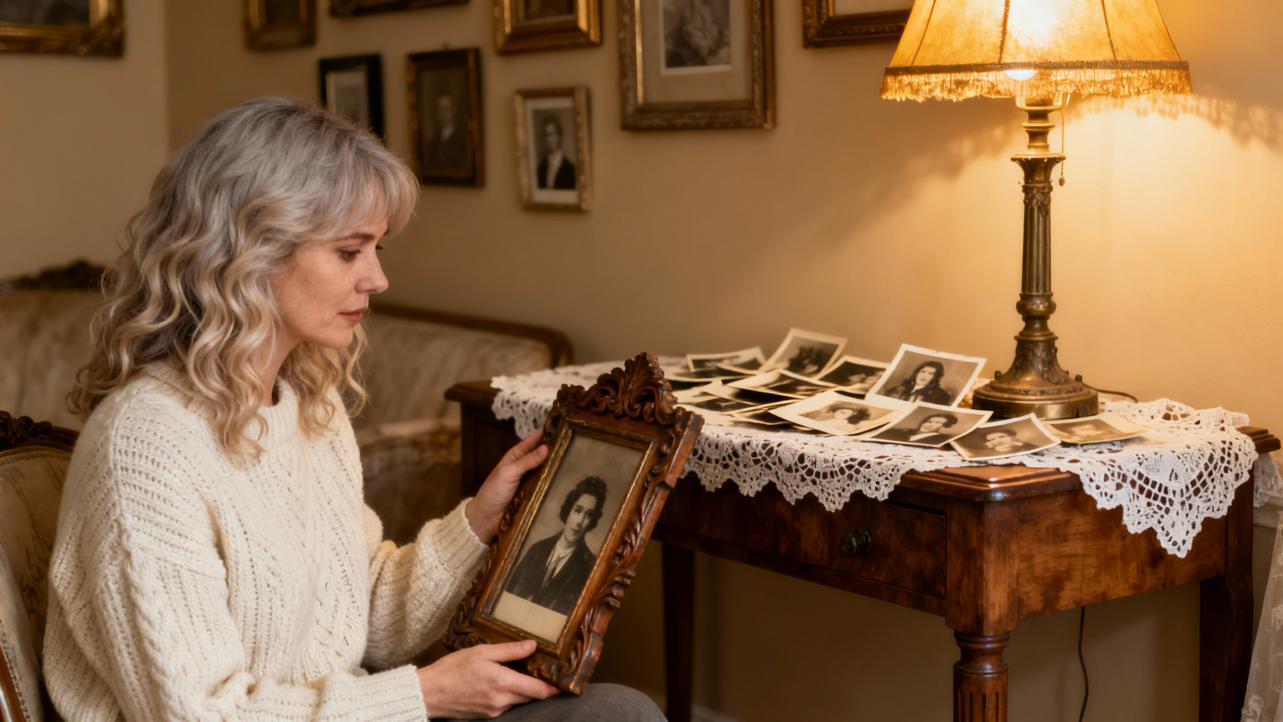
Vintage photographs are some of the most tender heirlooms we have. They carry the weight of family stories, small gestures, and fleeting expressions that live only in that thin layer of emulsion and paper. When you restore those photos thoughtfully and turn them into gifts, you are not just “fixing an image.” You are curating a shared memory and wrapping it in something tangible.
As an artful gifting specialist and sentimental curator, I see photo restoration as part conservation, part storytelling, and part handmade gift design. This guide walks you through the techniques and choices that help you revive old photographs and transform them into meaningful, nostalgic presents.
Why Restored Photos Make Extraordinary Gifts
Restoring old photos is often described, in resources like ArtSmart’s guides and various professional studios’ blogs, as preserving a family legacy. You are rescuing moments that are literally fading away. When you give someone a restored photograph, especially as a framed portrait, album, or keepsake, you are saying, “This chapter of our story matters.”
Families who digitize and restore prints often report a few powerful side effects. Relatives gather to identify faces and places, younger generations suddenly see great-grandparents as real people rather than distant names, and long-forgotten stories surface around the dinner table. Case studies from AI restoration services show everything from World War II portraits recovered from moldy attics to childhood photos rescued after house fires, becoming centerpieces at family reunions and memorials.
In gifting terms, this is the sweet spot: high emotional impact, deeply personal, and impossible to buy off a generic marketplace. A single restored snapshot of a grandparent’s first car, printed beautifully and paired with a handwritten note, often means more than the most expensive gadget.
How Vintage Photos Age—and Why That Matters for Your Gift
To restore photographs well enough for gift-quality prints, it helps to understand how they degrade. Research in photographic conservation and digital restoration, including a scientific paper on AI applications from the University of Novi Sad, breaks damage into two broad categories: internal and external.
Internal damage comes from the materials themselves and the original process. Old photo paper and film can yellow, dyes can shift, and grain can become harsh. Scratches on film can transfer as dots and lines; chemical changes can cause odd contrast shifts or solarization effects. Even in careful storage, time alone can soften detail, fade shadows, and push the paper toward a dull, yellowed tone.
External damage is the story of how that photo lived. Heat, humidity, and sunlight cause fading and brittleness. Attics and basements invite mold, water stains, and warping. Handling without care leads to creases, cracks, and tears. Adhesive tape, scrapbooks with acidic paper, and low-quality plastic sleeves can leave sticky residue and discoloration. Articles from Legacybox, MetalPrintStudio, and others all echo the same point: poor storage is as damaging as age itself.
When you are planning a nostalgic gift, you want to keep enough of that history to feel authentic while gently repairing what prevents the photo from being readable and beautiful. That balance is where technique matters.

Preparing Fragile Originals with Care
Before any digital magic, you are a conservator. How you handle the original can prevent permanent new damage.
Start by working with clean, dry hands and a clear surface. Handle photos by the edges, not the image area. If a print is clearly fragile, curled, or cracking, support it on a stiff backing board when you move it. Many archival recommendations mention cotton gloves; they can help, but clean bare hands with no lotions are often easier for beginners to control.
Dust and loose debris should be gently removed with a soft brush or a clean microfiber cloth. Multiple guides, including ArtSmart and Legacybox, advise avoiding water and generic cleaning solutions, which can swell the emulsion or lift ink. Some professional resources mention high-purity isopropyl alcohol for stubborn grime or mold, but this is a step for cautious spot testing, not casual wiping. If you smell mold or see active growth, it is wise to consider a professional conservator, especially for irreplaceable images.
Once the surface is as clean as safely possible, you are ready to digitize.
Scanning for Restoration-Ready Files
Every credible restoration guide repeats one mantra: quality in, quality out. A high-resolution scan is the foundation of any successful restoration and gift.
For most small vintage prints, scanning at a minimum of 600 DPI is strongly recommended. Several sources, including EverPresent and ProEDU, suggest going up to 1,200 DPI for tiny wallet photos or images with heavy damage, because the extra pixel detail gives you more room for precise retouching. Some Photoshop educators also recommend scanning at 16 bits per channel when the scanner allows it, which gives smoother tonal gradations for later edits.
Flatbed scanners typically outperform multifunction printer-scanners for this work. MetalPrintStudio and others have found that combo printer-scanners often add harsh contrast and lose shadow detail. If you truly cannot access a scanner, carefully photographing the print with even, diffuse lighting and a tripod or stable surface is a second-best option, but it adds distortion and lens artifacts you will later have to fix.
When you save your scan, choose a lossless or minimally compressed format. Professional and archival resources consistently favor TIFF as the gold standard for a master file. PSD (for Photoshop) or PNG are also good working formats. JPEG is fine for sharing and final delivery, but its lossy compression is not ideal for repeated editing.
Finally, treat your scan like a negative. Name it clearly, back it up to at least two other places such as an external drive and a reputable cloud service, and do all editing on copies. Many guides recommend a “three-layer backup” of primary device, external drive, and cloud. This is not glamorous, but your future self will thank you, especially once you have poured many hours into a restoration that will become an heirloom gift.

Choosing Your Restoration Path: AI, Manual, or Professional
Today you have three broad avenues for restoration: AI-based tools, manual editing in software, and professional services. In practice, the best results for sentimental gifts often come from blending them.
Here is a high-level comparison based on research from photo-restoration educators, AI restoration case studies, and an ACM conference paper on a human-interactive restoration framework.
Approach |
Best For |
Strengths |
Watch-outs |
AI tools |
Light to moderate damage; quick turnarounds |
Very fast; beginner-friendly; batch processing; good at basic cleanup |
Can over-smooth, invent details, or misinterpret historical context |
Manual editing |
Important faces; complex or artistic restorations |
Precise control; preserves nuance; non-destructive workflows possible |
Time-consuming; requires practice and good judgment |
Professional services |
Severely damaged or historically important photos |
Advanced skills and tools; color-managed; careful reconstruction |
Cost; turnaround times; quality varies by provider |
AI-Based Restoration: Powerful, But Not Infallible
AI photo restoration uses deep learning models trained on huge image datasets to detect scratches, noise, faded color, and even missing facial details. Tools like Remini, VanceAI, MyHeritage Photo Enhancer, RestorePhotos.io, CapCut’s online restorers, HitPaw FotorPea, and platforms highlighted by Modelia and ProEDU can often deliver surprisingly polished results in seconds.
A 2024 ACM conference paper by Seung-Yeon Back and colleagues describes a four-stage AI framework that reflects the current state of the art: major damage removal, noise reduction, facial restoration, and colorization, using models like Stable Diffusion, GFP-GAN, and DDColor. In experiments, this kind of pipeline restored everything from synthetic damaged portraits to real Korean War photographs with high subjective quality, especially when users guided the process.
Other research summarized by Clipping Path Campus cites an Adobe study suggesting neural networks can achieve a roughly 60 percent higher restoration success rate than traditional algorithms, and a University of Maryland study reporting around 64 percent precision when using GANs on significantly degraded images. These numbers underscore how far AI has come.
Still, both the ACM paper and a scientific study shared on ResearchGate warn about a key drawback. AI systems tend to smooth away grain and texture, sometimes softening important details and giving portraits a plastic look. They may also “hallucinate” plausible but historically inaccurate details in faces, clothing, and backgrounds. A Medium essay on AI restoration even frames this as a risk to historical memory when edited images circulate without context.
For gift-making, AI can be an excellent first pass, especially on lightly damaged or very faded photos. It is especially strong at quick scratch removal, basic color revival, and gentle sharpening. The critical step is review. Always zoom in, compare with the original scan, and decide where to accept the AI result, where to dial it back, and where to refine manually.
Manual Digital Restoration: Craftsmanship in Layers
Manual restoration with software like Adobe Photoshop or GIMP remains the gold standard when precision and authenticity matter most.
Industry guides from ProEDU, LearningCurve Global, and others all stress a non-destructive workflow. You duplicate the background layer, keep an untouched master, and use adjustment layers, masks, and smart objects rather than erasing pixels directly. This lets you change your mind, refine your gift later, or create multiple artistic variants without degrading the original data.
Core tools include Curves for tone and contrast, Clone Stamp and Healing brushes for scratches and tears, Patch Tool for larger damaged areas, and targeted Dodge and Burn for sculpting light and shadow. Photoshop’s Reduce Noise or similar filters help tame grain, while Unsharp Mask or Smart Sharpen can restore crispness as long as you apply them gently.
Manual methods shine when you are restoring a beloved face, rebuilding missing corners, or preserving specific historical textures. They are slower and require practice, but they let you honor the original photograph’s character while making it gift-ready.
When to Call a Professional Restorer
There are times when the most loving choice for your nostalgic gift is to bring in a specialist.
Multiple sources, including EverPresent, Legacybox, and professional retouching studios, recommend expert help when photos have severe water damage, mold, fire or heat damage, large missing sections, or legal and historical significance. Professionals typically have high-end scanners, calibrated monitors, color-management workflows, and years of retouching experience. They can reconstruct details, match historically plausible colors, and prepare files for high-quality printing.
If you plan to turn a single, irreplaceable wedding portrait or war-time photograph into the centerpiece of a multi-generational gift—such as a large framed print or a bespoke photo book—it is worth considering at least a consultation. You can still add your own creative touch later with how you present, frame, and pair the restored image with stories and handmade elements.

Core Restoration Techniques for Nostalgic Gift-Worthy Photos
Once you have chosen your path and prepared a quality scan, the work becomes both technical and artistic. The goal is not to make the image look “modern,” but to make it legible, emotionally resonant, and printable as a cherished gift.
Global Tone and Contrast: Breathing Life Back into the Image
Most old photos benefit immediately from careful global adjustments. Digital Photography School and other educators favor starting with Curves rather than simple Brightness/Contrast sliders because Curves allow you to set black and white points and gently shape contrast in one step.
You can click the darkest meaningful area with the black eyedropper to restore depth, then create a subtle S-curve to lift midtone contrast without blowing out highlights or plunging shadows into pure black. Constantly compare against the original and toggle adjustments on and off to keep the photograph natural.
If you plan to make a large print as a gift, pay extra attention to midtones where faces and clothing live. A well-balanced tonal range makes an old portrait feel suddenly three-dimensional and alive again.
Repairing Tears, Scratches, Stains, and Missing Pieces
After global tone, it is time to deal with physical damage that pulls the eye away from your subject.
For major rips or missing sections, restoration guides recommend starting with the Clone Stamp tool. Sample nearby undamaged areas and paint inward from the edges of the tear. Change your sample point frequently to avoid repetitive patterns. For large uniform backgrounds, you can reconstruct entire regions; for patterned or complex textures, work slowly and zoom in often.
Smaller defects such as dust, tiny scratches, and minor creases are excellent candidates for the Spot Healing Brush or Healing Brush. These tools analyze surrounding pixels and blend corrections seamlessly when used on small, discrete spots. Many professionals emphasize the importance of zooming in tightly and using small, precise strokes to keep the retouching invisible in the final print.
Water stains and mold spots are more challenging. Photoshop’s Patch Tool can replace a stained area with a clean region of similar texture. Combined with gentle exposure and contrast tweaks, this can salvage images that look hopeless at first glance. Again, when mold or active biological damage is extensive, consider professional advice.
Restoring and Refining Color
Color is where a photo often shifts from “old document” to “gift-worthy memory.”
Aged color photos typically develop yellow or blue casts. The standard sequence recommended in resources like EverPresent, ProEDU, and smart restoration guides is to correct the overall color cast first, then fine-tune specific tones. You can do this with white balance tools, Levels or Curves per color channel, and Color Balance or Hue/Saturation adjustments.
Aim for natural skin tones and believable neutrals. A white shirt, a tablecloth, or a cloudy sky often serves as a good reference. When you increase saturation to revive faded colors, keep a light hand; oversaturation quickly makes vintage scenes feel artificial, which can distract from their sentimental power.
Black-and-white photos have their own color work, which is really about tones. Converting to a dedicated black-and-white mode and then using Levels or Curves to separate shadows, midtones, and highlights can restore drama and clarity. Dodge and Burn tools, applied on a separate layer, let you gently brighten eyes and faces or deepen shadows, shaping the light the way a darkroom printer once would.
Some restorers add a soft sepia tone to maintain a period feel. For gift prints, this can be lovely, especially in wedding or family portraits, as long as it does not obscure fine detail.
Noise, Grain, and Sharpness
Scanned photos, especially those from small prints or negatives, can be noisy or grainy. Photoshop’s Reduce Noise filter or similar tools can smooth speckling, but excessive noise reduction can smear texture and make faces look waxy.
A common recommendation from professional guides is to zoom to 100 percent and apply modest noise reduction, focusing primarily on flat areas like skies or walls, then use layer masks or selective adjustments to preserve texture in faces and hair.
Sharpening is best done near the end of the workflow, tailored to your final print size. Unsharp Mask or Smart Sharpen can increase local contrast and reveal fine details. Use small radius values and conservative amounts, and always examine edges of eyes, mouths, and high-contrast areas for halos or crunchy artifacts. For a sentimental gift, viewers should notice the emotion in the scene, not the sharpening.
Breathing Color into Black-and-White Photos
Colorizing black-and-white photos can turn a treasured but distant-feeling image into something immediate and relatable, especially for children and teens. AI tools such as DeOldify, Palette.fm, and DDColor can provide a strong starting point by inferring plausible colors from grayscale tones and learned patterns.
ArtSmart and other resources emphasize a few best practices. Start with a high-resolution, well-cleaned scan. Favor subtle, balanced color rather than bright, modern palettes. Use manual adjustments after AI colorization to correct obvious mistakes such as incorrect eye color, unnatural skin tones, or historically implausible clothing colors.
Most importantly, be transparent. Colorization is interpretive, not a factual record. When you present a colorized print as a gift, especially if the photo has historical significance, it can be thoughtful to include a note that this is a modern artistic interpretation based on a black-and-white original. This keeps the emotional magic without confusing future viewers about what is historically certain.
Designing the Nostalgic Gift: From File to Heirloom
Once your image is restored, you move into curatorial and design territory. This is where you can lean fully into your creative, handmade-gift sensibility.
Framed Legacy Portraits
The classic choice is a beautifully restored portrait printed on quality photo paper and framed. For a milestone anniversary, you might restore the original wedding portrait, print it at a generous size such as 11×14 in or 16×20 in, and choose a frame that echoes the era of the photograph. A small plaque or handwritten note on the back, recording names, date, and place, turns the piece into a documented heirloom.
Several studios, such as MetalPrintStudio, also love producing metal prints from restored images. These prints on aluminum panels are durable, modern, and surprisingly elegant for black-and-white or muted vintage color, making them a wonderful option for wall displays that need to stand up to daily life.
Story-Rich Albums and Memory Boxes
If you have many related photos—perhaps a grandparent’s life story, or family holidays across decades—consider a curated album or memory box. After restoring each image, arrange them chronologically or by theme in a printed photo book or in acid-free sleeves within a handcrafted box.
Add captions, dates, and short anecdotes. A simple line such as “Grandma in her first apartment, about to leave for her new job” gives younger relatives a doorway into the story. Research on memory preservation repeatedly shows that context, not just imagery, helps families connect across generations.
Paired with small artifacts such as a dried flower, a piece of ribbon from a wedding dress, or a copied recipe card, a memory box becomes an extraordinarily intimate gift.
Wall Collages, Metal Prints, and Mixed-Media Art
You can also think in terms of arrangements and compositions rather than single images. A grid of restored photographs in matching frames along a hallway or above a sofa creates a family gallery. Mixing sizes and orientations while keeping a consistent frame color helps the collection feel curated rather than cluttered.
For a more experimental approach, metal prints, canvas wraps, or acrylic blocks of key restored images can be combined with painted backgrounds, calligraphy, or even hand-stitched elements. Some people print a restored portrait on canvas and then enhance it with paints or pencils, bridging restoration with contemporary art.
In every case, the restored image is the heart of the piece. Surroundings and materials are there to support the story, not overwhelm it.
Personalized Keepsakes and Everyday Objects
Restored photos are also perfect sources for smaller, everyday gifts that quietly carry meaning. Custom calendars that pair restored images with important family dates, jigsaw puzzles featuring a childhood scene, or stationery sets adorned with an old house portrait all turn digital work into tangible, daily reminders of shared history.
Online labs and local print shops can transfer restored photos onto ornaments, mugs, blankets, and more. To keep the spirit artisanal, you might combine a professionally printed item with a handmade detail such as a handwritten note, a sewn fabric sleeve, or a small booklet explaining the story behind the picture.

Protecting Authenticity, History, and Feelings
With all these tools at your fingertips, it is easy to overdo it. Ethical and emotional considerations matter, especially when you are altering images of real people and gifting them to family.
Scholars and practitioners caution against letting AI and heavy retouching quietly rewrite history. The ResearchGate paper on AI applications notes how automatic tools can smooth away age lines and textures that are part of a person’s real story. The Medium critique about AI “silently erasing our history” warns that if these polished versions become the only surviving images, future generations may inherit an overly sanitized view of the past.
A compassionate guideline is to aim for respect rather than perfection. Removing a distracting scratch over someone’s eye is restorative. Completely removing wrinkles, scars, or signs of hard-earned experience may, in some cases, feel like erasing part of who they were. Talk with family members when in doubt, especially if you plan to present the gift at a significant event.
Preserve your original scan alongside the restored version and clearly label AI-assisted or colorized images. This simple archival habit, recommended by multiple experts, keeps the record honest and helps future viewers understand what they are seeing.

A Home Workflow for Creating a Nostalgic Photo Gift
To make these ideas concrete, imagine you are preparing a birthday gift for a parent: a framed portrait of their parents taken in the early years of their marriage.
You begin by carefully selecting the best surviving print, often the one with the most authentic expression rather than the least damage. After gentle cleaning and a high-resolution scan at around 600 or even 1,200 DPI, you save a master TIFF file and back it up in multiple places.
Next you might run the image through a reputable AI restoration tool, asking it to remove surface scratches and improve clarity. You review the result closely, comparing it with the original scan. If the AI has over-smoothed faces or changed subtle features, you lower its effect or selectively mask those areas.
Then you open the working file in Photoshop or GIMP. You adjust global tone and contrast with Curves, repair remaining tears or stains with Clone and Healing tools, and correct the color cast until skin tones and clothing feel believable. If the original is black-and-white and you choose to keep it that way, you refine the grayscale tones and perhaps add a soft sepia tint.
With the restoration complete, you prepare a print-ready version sized for your chosen frame and send it to a trusted lab or a high-quality home printer. You pick a frame that suits both the photograph’s era and your recipient’s taste, add a small card on the back with names and dates, and perhaps include a short written memory you gathered from family.
The finished piece is not just an image; it is an invitation to stories. When your parent opens it, what they experience is not the hours of digital work, but the feeling that someone took great care to honor their history.

FAQ: Crafting Restored Photo Gifts at Home
How high should I scan if I want to make gift prints?
For most gift projects, scanning at around 600 DPI is a safe minimum, with higher resolutions up to about 1,200 DPI helpful for very small or heavily damaged prints. Professional sources consistently recommend saving a lossless master such as TIFF for restoration, then exporting JPEG or PNG copies for sharing and lab printing.
Is AI alone enough for a sentimental, gift-quality restoration?
AI tools are excellent for speeding up basic cleanup, and research from Adobe and university labs shows they can outperform traditional algorithms on many technical measures. However, studies presented in venues like ACM CIKM and ResearchGate also show that AI tends to smooth away important textures and sometimes invent details. For an emotionally significant gift, it is wise to review AI output carefully and, when possible, add manual refinements or consult a professional.
Which file format should I keep long term?
Guides from restoration educators and services overwhelmingly favor TIFF as the archival master because it is lossless and widely supported. PSD or similar layered formats are useful during editing, while JPEG and PNG are good for distribution and everyday use. Whatever you choose, keeping both original scans and restored versions in multiple locations is more important than the specific format.
A restored photo gift is part craft project, part quiet act of love. When you handle the originals gently, choose your techniques thoughtfully, and design the final presentation with care, you do more than revive an old picture. You help your favorite stories survive in vivid detail, ready to be passed from hand to hand and heart to heart.
References
- https://do-server1.sfs.uwm.edu/goto/9U3Z768545/book/5U1Z383/digital__restoration__from_start-to-finish_how_to-repair__old__and-damaged__photographs.pdf
- https://arxiv.org/html/2410.09529v1
- https://www.researchgate.net/publication/385464203_RESTORATION_OF_OLD_PHOTOGRAPHS_USING_AI_APPLICATIONS
- https://ononesoft.cachefly.net/content/plus/Bookshelf/ON1-Plus-Photo-Restoration-Guide.pdf
- https://www.photofixrestore.com/the-pfr-blog.html
- https://www.clippingpathcampus.com/photo-restoration/
- https://smart.dhgate.com/ultimate-guide-to-restoring-old-pictures-techniques-and-tools-for-stunning-photo-revival/
- https://digital-photography-school.com/how-to-restore-old-damaged-photos/
- https://www.digitalphotoeditingservices.com/blog/smart-techniques-to-restore-your-old-photos
- https://everpresent.com/how-to-restore-old-photos/
